Tower of the Mad Mage Guide
Authors: Lightbringer, Sharpedge, Viral
Last Updated: 22/10/2019
Preface
Module 17 brings Neverwinter’s hardest content to date, Tower of the Mad Mage. This Trial is not to be taken lightly and actually poses some threat to the player and preparation is the key to success. This guide outlines what you need to know in order to complete the trial, covering topics like recommended gear, boss mechanics and even niche use powers. Aside from having a much higher item level requirement than most content has relative to the maximum (24,000), it also has a level of mechanical complexity not seen elsewhere in the game, which although challenging, is also fair. Players should expect to fail and fail many times before success, this isn’t going to be something you complete on your first attempt.
Recommended Ratings
Due to the difficulty of the raid, it is advisable to go into it prepared, with the right ratings and a properly prepared character. The first time you run it, you will likely want a statistic distribution similar to the following as a DpS:
- 400,000 Hitpoints.
- 80,000 Defense.
- 80,000 Armour Penetration.
- 80,000 Critical Strike.
- 70,000-80,000 Accuracy, no more than 80,000. Ideally you want 80,000, but you can complete the trial with less.
- The rest of your ratings can be distributed into Power and Combat Advantage, with no more than 130,000 Combat Advantage.
Whilst reaching 400,000 Hitpoints in addition to the above can prove daunting at first, there are a few items that can make the job a little easier:
- War Triceratops (or the lesser version of it).
- Energon pet.
- Hitpoints reinforcement kits.
Once you are more comfortable with the raid, you can consider losing some Hitpoints for more offensive ratings. I do not recommend doing this until you know what you are doing and you have a good team. You need to be able to survive hits that exceed 1 million damage and with lower than 400,000 Hitpoints, that takes teamwork. Recommended incremental HP drops are the following:
- 360,000 Hitpoints (lose the Energon).
- 310,000 Hitpoints (lose the War Triceratops).
- ~290,000 Hitpoints (lose the Reinforcement kits).
If at any point you are feeling uncomfortable, reequip the above. This trial is about teamwork and survival, it is not a race to see who can do the most damage. Here is a spreadsheet to help illustrate why defensive statistics are so important.
Classes
DPS
In addition to the recommended statistics in the section above, you should probably also have at least 150,000 power, 175,000 is good and 200,000 is a goal post, although it is possible to achieve more.
Healer
In addition to the recommended statistics above, a healer should at least have 150,000 Power, 85,000 Critical Avoidance (95,000 if you are a healing class with divinity) and 40% Outgoing Healing.
Paladin
You will always want to have one paladin in your group, shields are very important.
Divinity management is very important throughout the fight! That means Paladins will have to play as efficiently as possible and do what they are best at: shielding, not topping players off!
As a Paladin you try to trigger Critical Touch all the time and you make sure that everyone has at least a normal shield applied to them. The only times where you spam Divine Touch is during Heatwave and if the tank drops really low, other classes excel better at refilling hitpoints. While Paladins will only be using Divine Touch for the most part of the trial, there are some situations where Divine Shelter is very useful, it is recommended to swap it in for the phases where players spread out and stay seperated for a longer period of time, such as the Disintegration Wave part of the Lightning rotation in phase 3.
Cleric
Clerics are more efficient at refilling hitpoints than Paladins, so they should take care of tank and spot healing for the most part, they also have access to Astral Shield which is a very useful tool to mitigate damage from the big hits such as Annihilate and Super Storm etc.
Warlock
Warlock is the most efficient single target healer because of Soul Reconstruction. Warlock also has the fastest way to regenerate healing resources but doesn’t have the heals per second of a Cleric. This class brings a lot of cheap utility in from of Pillars of Power and Warding Curse, it is very viable next to a Paladin because these classes supplement each other very well.
Tanks
As a tank your character should cap Defense and Critical Avoidance. After that stack everything else into HP, you should want at the very minimum around 650,000 and getting as high as possible, this being around 800,000+ on Fighter and Paladin and 1,200,000m+ on barbarian while buffed. Deflect is not a priority as you cannot rely on a 100% uptime, it will only help with arcane blasts and the occasional annihilate 3+ stacks if you are lucky. The main source of deflect is from pet gear which comes on dual stat gear with the other stats you want, and then stacking arcane rune stones as everything else is capped.
Awareness isn’t needed on a tank as Halaster will only have Combat Advantage if you are between Halaster and Permafrost.
Niche skills with practical use
Each class has some niche skills which may prove useful in the raid, here is a list of some and what they can be good for.
- Shield (Wizard) – Mitigates 80% of incoming damage when it is not burst and 30% when it is burst on mastery. Huge survivability increase. Can help between the 60-40% boss hp period, or in weaker groups.
- Bloodbath (Rogue) – Grants immunity to damage during its animation. If you can quick swap to it in combat, it can be a life saver in risky situations.
- Astral Shield (Cleric) – Can be used to mitigate large hits due to their long cast time. There is enough time for you to cast the skill preemptively. For example, an incoming annihilate.
- Phalanx (Fighter) – Mitigate the damage taken by anyone standing within it by 20%.
- Knights Valor (fighter) – If the aggro becomes lost, and a dps is about to take the annihilation, if they stand near the Fighter, they will take the damage and not gain an imminent annihilation debuff stack.
General Items
The following list of items may prove useful within the trial and it is recommended that they are covered within the group, ideally everyone has them:
- 5 Tactical Enchantments, for utility slots. They increase the shielded HP provided by Paladins and as a result they are Best in Slot for this raid, where you are hit for over 1 million damage and mitigating damage is an utmost priority.
- Armored Griffons. Ideally there are 3 people in the group using these, 2 of them alternate activating them on Whiteout, Super Storm and Heatwave, the third person acts as a backup in the event that neither of them can use their griffon.
- Swarms. The swarm combat power stacks and provides a 5% debuff. Ideally have someone call out when to use them, along with the artifacts, to maximize burst, is a great way to speed up the run.
- Support Artifacts. Within the group you want to cover all the different Artifacts which benefit the team. The artifacts in question are the Halaster’s Blast Scepter, Wyvern-Venom Coated Knives, the Lantern of Revelation, the Vanguard’s Banner, the Charm of the Serpent, The Heart of the Black Dragon and the Staff of Flowers. The first 6 are debuff artifacts, which increases the damage the target takes and the last one increases the party’s power. Whilst the Token of the Chromatic Storm and Thirst exist and are also debuff artifacts, the former is difficult to aim and the latter will likely throw you off the edge of the platform. Artifacts that reduce the enemies damage, like Champion’s Banner and Tiamat’s Orb also have potential utility in the trial.
- The Forgehammer of Gond is also an excellent Artifact to potentially have as it reduces incoming damage by 50% for 5 seconds. It is advisable for a single person to use this, in order to run into the Firebomb and soak the damage it deals. The Sigil of the Fighter is capped at 100,000 damage mitigation and as a result it is not recommended.
- Barkshield Armour Enchantments for DpS.
- The resurrection sickness boon is not a must, but it is highly recommended.
User Interface
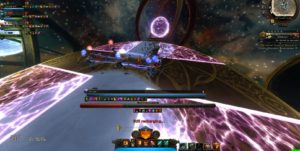
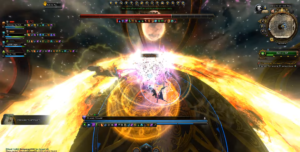
This advice is specific to PC only, as you cannot modify the UI on consoles. As a DpS, it is recommended to turn off all User Interface, with the exception of HP. It is also recommended to turn off damage floaters for a DpS, as well as other player names and other player HP bars. By removing all of the clutter, it becomes much easier to see the mechanics. Here is an example of what some of the fight sections look like with de cluttered UI:
For a paladin it is important to always have allies HP bars toggled on, in order to see who has shields and who does not. For a Cleric or Warlock, you can either have allies HP bars permanently on, or only show if an ally has taken damage recently.
Mechanics
The entire boss fight and its mechanics are centralized around elemental themes. Due to that, his attacks are divided into which element they fall into.
Arcane Powers
Annihilate
- Visual indicator: Halaster lifts his hand with a giant blue ball that has an animation of around 10 seconds, it cannot be missed.
- Cannot be Immunity Framed.
- Deals ~1,000,000 damage to the current target and everyone within a radius of ~5y.
- Applies a stack-able debuff (Imminent Annihilation) that increases damage taken by Annihilate, Arcane Blast and Disintegration wave for 45 seconds. Dying does not remove the debuff.
- Tanks will have to swap aggro after 2 stacks.
Arcane Blast
- Deals ~250,000 damage, often cast as 3-fold attack, impacting once a second.
- Can be Immunity Framed.
- Imminent Annihilation will increase this damage.
Disintegration Wave
- Visual indicator: Halaster will leave the battlefield and raise a hand dictating where to move to avoid a heavy hitting AoE on one half of the platform.
- Cannot be Immunity Framed.
- It deals ~1,600,000m damage.
- Applies 4 stacks of Imminent Annihilation.
- Towards the end he will use 2 at the same time, sometimes having no safe areas, however the damage is much lower and is possible to live taking 1 hit.
Portals:
- Visual indicator: Halaster claps.
- They only appear in Phase 1.
- When you run into a portal you’ll spawn at the location of another portal.
Cold Powers
Creeping Ice
- Visual indicator: Halaster lifts his RIGHT hand.
- Cannot Immunity Framed.
- Halaster makes parts of the ground into slick ice, players on the ice are unable to use abilities and will slide over the ice like in Icewind Dale.
- People on Creeping Ice cannot perform actions, including use powers or drink potions. Healers should keep an eye out for people in this compromising position and heal where necessary.
- It also deals 152,625 damage per second to players on the ice.
Downburst
- Visual indicator: Halaster hugs an invisible ball and then releases it, spreading his arms.
- Can be Immunity Framed.
- Halaster will summon a Downburst in the middle of the arena, after ~5 seconds it will push everyone away from the center.
- Do not jump while Downburst is present, being repulsed while you are in the air causes your momentum to increase and you will be thrown further as a result.
- It is recommended that everyone present places themselves on the same side of the Downburst, close to it’s eye.
Duumvirate
- Visual indicator: Halaster lifts his LEFT hand, marking his current target.
- You can Immunity Frame the wide Area of Effect, but not the damage dealt when standing close to Halaster.
- This target will be unable to move and the border of their screen will turn to ice.
- After 2 seconds they take ~1.6m damage, this damage can be divided between the main- and off-tank if the off-tank stand next to the main-tank.
Hypothermia
- Visual indicator: Halaster lifts his LEFT hand and arrows are placed above player/s heads.
- Cannot be Immunity Framed.
- Deals heavy damage to the targeted player(s), if the target is surrounded by other players it will take survivable damage, but the other players will take damage as well.
- If there are 2 Hypothermia arrows active at the same time you have to split into 2 groups because players who are standing in the overlap take 10x damage and die. Double Hypothermia always exclusively targets the 2 healers, unless one of the healers is missing.
- The chance to critically hit is based on the targeted player, and not personal critical avoidance, which has lead to tanks taking critical damage even when capped.
- The damage is also divided among summoned pets, if you choose to use one.

- The way we recommend to do this is as follows:
- Firstly, by default have 2 groups, with the DpS on 1 side and the 2 tanks on the other side of the boss.
- Along with the 2 tanks, have 2 designated players whose job is to move to the tank’s side when Hypothermia appears.
- When Hypothermia appears, those 2 players move onto the tanks side.
- One of the healers who are targeted by arrows moves onto the tanks side, and the other stays with the DpS.
Permafrost
- Visual indicator: Halaster lifts his RIGHT hand, casts an ice animation and 4 people will be surrounded by a ice-blue colored shimmering ribbon.
- Cannot be Immunity Framed.
- Halaster will cast Permafrost at 1-4 people, if the Permafrost is not destroyed in time, the frosted persons will die (permanent death).
Whiteout
- Visual indicator: He casts an ice animation with BOTH hands.
- Cannot be Immunity Framed.
- Deals ~3,000,000 damage to everyone who is not standing behind the Permafrost. When it occurs, Halaster summons 2 or 4 pieces of permafrost on players locations, you will need to hide behind them, similar to the mechanic in Fangbreaker Island. It is recommended that the players targeted by Permafrost (indicated by small, blue ribbons circling around them) group up to make it easier to destroy the Ice after Whiteout occurs). If there are 4 pieces of Permafrost, it is recommended you damage some of them, as if you do not break the permafrost in time after Whiteout occurs the party members caught inside it will permanently die.
Fire Powers
Eruption
- Visual indicator: Halaster lifts his RIGHT hand, casts a fire animation and there are NO red circles on the ground.
- Cannot be Immunity Framed.
- Delayed Eruptions will chase a randomly picked player for ~10 seconds. The eruptions deal ~400,000 damage per tick, they tick one time per second.
- Eruption always targets a DpS.
Firebomb Explosion
- Visual indicator: Halaster lifts his LEFT hand, casts a fire animation and there are no red circles on the ground.
- Cannot be Immunity Framed.
- If someone jumps into it, it will hit the person for 1,600,000-1,700,000 damage.
- If nobody moves into it, it will explode for ~1,200,000 Area of Effect damage and deal ~620,000 damage per second over 10 seconds.
- It is recommended that a tank or a player using the Forge Hammer of Gond runs into this.
Fire Burst
- Visual indicator: Halaster lifts his LEFT hand, casts a fire animation and there ARE red circles on the ground.
- It can be Immunity Framed.
- Deals ~600,000-650,000 damage. Indicated by red circles on the ground, followed by an explosion.
Heatwave
- Visual indicator: He casts a fire animation with BOTH hands.
- The dot cannot be dodged.
- Fire damage over time: Deals ~223,850 damage per second over 10s.
Lava Ring
- Visual indicator: The outer ring starts to glow red and then shortly after lava comes up.
- Can be Immunity Framed.
- Halaster will flood the outer ring of the platform with lava. It deals 610,500 damage per second.

Searing Chain
- Visual indicator: Halaster lifts BOTH hands to his side.
- Cannot be Immunity Framed.
- This ability will chain 2 players together, it deals ~200,000 damage per second, it breaks if the chained players run away from each other.
- There will always be 2 chains at the same time.
Lightning Powers
Charges
- Visual indicator: Halaster lifts his LEFT hand and players will be connected to each other in pairs of two.
- The pull can be Immunity Framed.
- Every connected player will get a PLUS or MINUS symbol above their head.
- After ~10 seconds connected players with the same charges will be pushed away from each other and players with different charges will be pulled together, if people collide from being pulled together, they receive a debuff that reduces their outgoing damage by a huge margin (duration is 6 minutes and is not removed by death).
- The repulsion/attraction cannot be immunity framed.
- It is recommended in phase 1 everyone spreads regardless of their charges, rather than risk taking a debuff.
- While practicing it is advised to go to the middle, as it is better to take the damage debuff then to fall off and die, however this will not result in a successful run.
- Do not jump while you have charges, being repulsed while you are in the air causes your momentum to increase and you will be thrown further as a result.
- If there is Creeping Ice on the platform, ensure that if you will be repulsed, the repulsion will not push you onto the ice as it will push you off the platform.
Electrified Floor
- In phase 3 during the electric phase Halaster will electrify parts of the ground.
- It deals 256,390 damage per second. The pattern can inverse at random towards the end of the fight, meaning only the edges are safe, this usually happens during disintegration wave.
Ground to Cloud/Cloud to Ground
- Visual indicator: Halaster lifts his RIGHT hand, followed by a purple electricity wave flashed up.
- Can be Immunity Framed, with the exception of the hit of Cloud to Ground targeted at the you. Credits to @solanacae for noticing this change.
- Ground to Cloud deals ~750,000 AoE damage in a 5y radius. It will be targeted at the position where players stand during the purple wave.
- After ~4s this attack will be followed up by Cloud to Ground which deals ~300,000 AoE damage in a 5y radius, don’t overlap it.
- It is recommended to move the moment the animation plays and spread out.
Super Storm
- Visual indicator: He casts an electric animation with BOTH hands.
- Cannot be Immunity Framed.
- Deals ~969,393 damage to everyone.
Other
Death from Above
- Can be Immunity Framed.
- This ability does proximity based damage, dealing the maximum amount of damage the closer the player is to the center of the platform and the minimum amount, if they are on the edge of it.
- Halaster will cast it at the start of Phase 3 and after every Disintegration Wave.
Sunfall
- Visual indicator: Halaster raises Both his arms and channels fire.
- Occurs in phase 3 at 10% boss HP.
- Starts at ~115,000 damage and progressively increases as the phase progresses.
- After 25 seconds the screen starts to turn white, at 30 seconds it will be completely white.
- After 30 seconds, if you have not killed the boss, you are all hit for ~5,800,000 damage which cannot be mitigated.
Boss Rotations – Phase 1
- During Phase 1, the boss has 3 elemental phases, fire, cold and lightning. At 80% HP, the first phase begins and is chosen at random. At 60% HP, the second elemental phase begins and is chosen from the remaining 2. At 40% HP, the final elemental phase occurs. When the boss reaches 20% HP, the second phase of the overall boss fight occurs.
- Fire Elemental Phase
- Audio tell, “How do you feel about warm weather?”
- Heatwave.
- Fire Burst x2.
- Eruption + Firebomb Explosion.
- Searing Chains.
- Fireburst.
- Repeat.
- Cold Elemental Phase
- Audio tell, “Bundle up for the cold front.”
- Whiteout +4 Permafrost.
- Hypothermia.
- Duumvirate.
- Downburst + Hypothermia.
- 2x Permafrost.
- 3x Creeping Ice.
- Duumvirate
- Repeat.
- Lightning Elemental Phase
- Audio tell, “I feel a storm coming on!”
- Super Storm.
- Ground to Cloud/Cloud to Ground.
- Charges.
- Ground to Cloud/Cloud to Ground.
- Repeat.
- Intermittently between all parts of phase 1, he uses Arcane Blast, Annihilate and Portals.
Boss Rotations – Phase 2
When Halaster drops to ~20% HP in Phase 1, the transition to Phase 2 will start. Everything but the small platform in the middle will catch fire and a protective bubble will spawn around the platform. Halaster will grow to a gigantic size and try to destroy the bubble with his hands, you have 30 seconds to attack the hands, if you don’t deal enough damage the group will wipe. During this phase, the boss has ~50m HP, so each damage dealer needs to do approximately 277,778 damage per second in order to complete the phase.
Boss Rotations – Phase 3
- Phase 3 starts with Death from Above. It is recommended that everyone picks 1 direction and moves in it together to the outer edge of the platform. As it is easy to see North on the compass, this is the direction we prefer.
- Halaster has more complicated Elemental Phases in phase 3. If you hit the ending HP threshold for a phase before he has used all the powers in the phase, he will skip to that phases Disintegration Wave.
- He has a Single Element Phase where he only uses 1 element at a time. He switches between elements at these thresholds:
- 100%-90% HP.
- 90%-80% HP.
- 80%-70% HP.
- In the Dual Element Phase he will use powers from combinations of 2 elements. The switch points between combinations are at these thresholds:
- 70%-55% HP. The phase begins when Halaster says, “That was just a warm up.”
- 55%-40% HP. The phase begins when Halaster says, “This is beginning to get interesting.”
- 40%-25% HP. The phase begins when Halaster says, “Perhaps you are worthy foes after all.”
- Finally an All Element Phase, where he uses powers from all 3 which lasts from 25%-10% HP.
- The Single Element Phase occurs at the start of phase 3. Like in phase 1 of the overall fight, he picks which element to use at random. He will use the single element until 10% of the bosses HP has been removed and then will switch to the next element. Once the boss reaches 70% HP, he moves onto the Dual Element phase.
- You only have 12 minutes and 30 seconds to complete phase 3, if you do not manage to complete phase 3 in this time, the fight skips straight to sunfall. The audio log for the skip is, “This…is… the end.”
- Note: The rotations provided here for phase 3 are not his complete rotations, however if you continue past the times provided here, you will run out of time in the fight.
- Cold Element Phase
- Visual tell, the balls on the outside of the arena turn blue.
- Audio tell, “I’ll freeze you to the bone!”
- Whiteout + 2x Permafrost.
- Creeping Ice.
- Downburst + 2x Hypothermia.
- Duumvirate.
- 4x Permafrost.
- Creeping Ice in the middle.
- Hypothermia.
- Disintegration Wave.
- Death from Above.
- Fire Element Phase
- Visual tell, the balls on the outside of the arena turn red.
- Audio tell, “I’ll burn you all to ash!”
- Heatwave.
- Lava Ring.
- Fireburst (Square).
- Fireburst (Ring).
- Eruption + Firebomb Explosion.
- Fireburst (Ring).
- Fire Burst (Cross).
- Disintegration Wave.
- Searing Chains.
- Fireburst (Cross) at 45°.
- Death from Above.
- Lightning Element Phase
- Visual tell, the balls on the outside of the arena turn purple.
- Audio tell, “Feel the raging tempest!”
- Super Storm.
- Electrified Floor.
- Ground to Cloud/Cloud to Ground.
- Charges.
- Ground to Cloud/Cloud to Ground.
- Disintegration Wave.
- Ground to Cloud/Cloud to Ground.
- Death from Above.
- After this point, Halaster begins his Duel Element Phase. During these phases, he will use combinations of powers from any 2 elements. He will pick one of the combinations to use and use it until 15% of the bosses HP has been removed and then switch to one of the other combinations, never going back to a combination already used previously. Once the boss reaches 25% HP, the Dual Element phases end and he begins the All Element Phase.
- Lightning + Cold Hybrid Phase
- Visual tell, the balls outside the arena alternate blue and purple.
- Audio tell, “I’ll freeze you to the bone!”
- Electrified Floor and Whiteout + 2x Permafrost.
- 2x Hypothermia.
- Ground to Cloud/Cloud to Ground.
- Downburst + Ground to Cloud/Cloud to Ground.
- Permafrost.
- Ground to Cloud/Cloud to Ground (shortly after Permafrost).
- 2x Creeping Ice.
- Charges.
- Audio tell, “Feel the raging tempest!”
- Superstorm.
- Downburst + 2x Hypothermia
- Ground to Cloud/Cloud to Ground x2.
- Disintegration Wave + 2x Hypothermia + inverted Electrified Floor.
- Normal Electrified Floor.
- Death from Above.
- Fire + Lighting Hybrid Phase
- Visual tell, the balls outside the arena alternate purple and red.
- Audio tell, “Feel the raging tempest!”
- Superstorm.
- Lava Ring.
- Fire Burst (snail).
- Ground to Cloud/Cloud to Ground. + Fire Burst (Square).
- Searing Chains + replacing Lava Ring with Electrified Floor.
- Eruption + Firebomb Explosion.
- Audio tell, “I’ll burn you all to ash!”
- Heatwave.
- Ground to Cloud/Cloud to Ground + Fire Burst (Cross).
- Charges.
- Ground to Cloud/Cloud to Ground + Fire Burst (Cross).
- Disintegration Wave.
- Ground to Cloud/Cloud to Ground + Fire Burst (Cross).
- Death from Above.
- Fire + Cold Hybrid Phase
- Visual tell, the balls outside the arena alternate red and blue.
- Audio tell, “I’ll freeze you to the bone!”
- Whiteout + 2x Permafrost
- Lava Ring.
- Fire Burst (snail).
- 2x Searing Chains.
- Fireburst (Square).
- Downburst.
- Creeping Ice in the middle.
- Audio tell, “I’ll burn you all to ash!”
- Heatwave.
- Fireburst (cross) at 45°.
- 2x Searing Chains.
- Eruption + Firebomb Explosion.
- Fireburst (cross) at 45°.
- Fire Burst (Cross).
- Disintegration Wave+ 1x Hypothermia.
- Fireburst (cross) at 45°.
- Fire Burst (Cross).
- Death from Above.
- At 25% HP, he enters the All Element Phase, where he uses rotations combining all 3 powers. This phase begins with:
- Double Firebomb Phase
- Visual tell, the balls outside the arena go dark blue, with a red halo and a purple ring around them.
- Audio tell, “I haven’t had a workout like this in ages.”
- Electrified Floor.
- 2x Firebombs (They always spawn North and South)+ 2x Hypothermia + Downburst.
- All Elements Phase
- After each Disintegration wave, move Counter Clockwise.
- Audio tell, “There will be no escape.”
- Audio tell, “Feel the raging tempest!”
- Superstorm + Disintegration Wave.
- Audio tell, “I’ll burn you all to ash!”
- Heatwave + Disintegration Wave.
- Audio tell, “I’ll freeze you to the bone!”
- Whiteout +2x Permafrost + Disintegration Wave.
- Searing Chains + 1x Hypothermia (The hypothermia always targets a chained person).
- Fireburst (ring).
- Fire Burst (Cross) at 45°.
- Ground to Cloud/Cloud to Ground + Fire Burst (Cross).
- Fire Burst (Cross) at 45°.
- Charges.
- Downburst.
- 2x Hypothermia.
- Lava Ring + Fire Burst.
- 2x Eruption + Firebomb.
- Hypothermia.
- Ground to Cloud/Cloud to Ground.
- Fireburst (Square).
- Fireburst (Ring).
- Fireburst (Square).
- Fire Burst (Cross) at 45°.
- Fire Burst (Cross).
- Disintegration Wave.
Boss Rotations – Phase 4
When Halaster reaches 10%, phase 4 starts. He has a minor rotation, followed by Sunfall.
- Fire Burst (Cross) + Disintegration Wave.
- Fire Burst (Cross) at 45° (started after the first Detonation of the previous one).
- Downburst + Ground to Cloud/Cloud to Ground.
- 2x Disintegration Wave.
- Hypothermia + 2x Eruption.
- Audio tell, “This…is…the end.”
- Sunfall.
Phase Management
In some cases it may be wise to stop dealing damage to the boss and wait for him to play out a few additional mechanics, instead of forcing him to move into the next phase. This is because forcing phase transitions can cause combinations of powers which are extremely difficult to deal with to occur, which would otherwise not happen. For example, if you force a phase transition to Sunfall while there is creeping Ice in the middle of the arena, it would be impossible to finish the fight due to the presence of the Ice.
Videos
Here are some videos of the fight.
Addendum to the guide itself:
Sume’s Video Guide:
Tardli’s Video:
Cayley’s PoV as Solo Healer:
You can watch regular runs when the trial goes live here:
https://www.twitch.tv/zyandraa
Conclusion
Thus concludes the guide for Tower of the Mad Mage. If you made it this far, thanks for sticking with us. For those of you who are going to be trying this trial, don’t expect to beat it the first time you try and don’t be put off by failure. It is a big step up from the regular content in the game, but the rewards are definitely worth it.
[…] click here. Having trouble with the Tower of the Mad Mage (aka ToMM)? Make sure you check out the Tower of the Mad Mage Guide by Lightbringer, Sharpedge and […]
Trying to prepare a group on ps4, as a cleric, what would be the best rotation to help buff/debuff and mitigated damage from the tanks. It seems like the struggle with our runs, so far, is that the tanks, even if sharing damage, die quickly.
Currently trying: astral shield, intercession, bastion as a rotation. Mainly using hallowed ground as daily. Wyvern set bonus with staff of flowers as main artifact to get them to triple stack with hallowed or anointed.
any help would be greatly appreciated.
I spoke to the clerics I usually run with and their opinion is, if you need to use geas/hg to protect your tanks, your tanks are probably not built correctly for ToMM. A tank with good gear can survive up to 8 stacks without additional mitigation tools from a cleric, a tank with mediocre gear can survive at least 3. Their recommendation is for your tanks to actually review what they are doing, because the problem is likely with them and not with you.
[…] Tower of the Mad Mage Guide […]
I do not understand how one can fight and take detailed notes of hundreds of minutiae. In fact, it is a fulltime job to note all these details even if only watching others fight.
I respect your effort, have read it and I must say that I have learned chirurgical procedures with less information than this.
How did we get from =tips and tricks= to a full-blown treatise in a game?
Of course, not all content should be liked by everyone, this trial will be fun 2 mods from now, when we are overpowered.
.
I am tired peeps QQing that Nwo has no mechanics. Its a welcoming change!
WoW trials are normally done by the most experienced guilds for several months. Its nice to see some of that concept here…
[…] Tower of the Mad Mage Guide Tower of the Mad Mage Guide […]
Could you also possibly tell me if deflection severity(cause it is no longer on the character sheet ) is still working in the game notably on foe hammers favor elixir ..Or On Tr class (cause theirs used to be the highest of all classes )
https://neverwinter.gamepedia.com/Foehammer%27s_Favor_Elixir
They are still working. Here is an image where you can see the deflect before and after the elixer:


+1 Thanks for this guide
Has the Wand of Portabello’s Sight been considered at all to use as a strategy/ applications for any of the phases ?
to soak /avoid damage / mobility ? / distract as a target / taking the hit for something at range while still under someone local influence or aura ..
https://neverwinter.gamepedia.com/Portobello%27s_Wand_of_Sight
None of us have 1, so we can’t try it out 🙁
Janne thanks for hosting this. I really like the way you have implemented guides on your site. I agree with you, everyone needs to take responsibility for themselves by reading, preparing and practicing. I also agree that people should be practicing for this trial on preview even after MOD 17 goes live. It just makes more sense to practice and learn on preview where people can try out new gear and builds without the costs associated. Chris, one way to keep this trail from becoming elitist or exp only is to make your own groups and not require experience or… Read more »
Thanks for all the info, great to get such an indepth heads up!
Unfortunately, I do see this trial ending up being very elitist, especially at initial access as people making runs will only want exp players on their runs. So anyone who hasn’t tried it on preview will already be late to the party 🙁
True that!
This is up to the players to group. I don’t see a reason why you or anyone can’t try to make their own group, try and learn. Get your guild, friends, alliance, whoever and group up (or join if they group up). Whether it is on live or preview, also preview is free (in terms of consumables and gear upgrades) and allows people to adjust their char to see what works for them. The trial is hard, and like everything the not sleep inducing easy, it will take some practice and attempts, but there are no secrets to it, here… Read more »
I dont feel the mechanics are that hard to deal with, the thing I find the hardest from reading it is that in most of them someone has to suck up damage and they are extremely massive, like 1 million damage? Most people except tanks barely have 300k. Having to rely all the time on the double life shield from the paladin is very specific too but it feels like its mandatory. I sure will have a try once it comes on condole but if I end up stuck for days trying I may just skip it until they adjust… Read more »
These are stat checks, you can meet them without a paladin, for example, by having 400k HP and 80k defense, but obviously having a Paladin does make it easier.